If you’re a homeowner weighing an off‑the‑shelf solar kit versus a full professional install, this guide breaks down what a “solar kit” really includes, which kit types fit common needs, how to size one, and the safety, permitting, and incentive steps to consider. Read this first to decide whether a DIY kit will meet your goals or whether you should hire a certified solar contractor.
Quick answer: Who should consider a solar kit?
Solar kits work well for small, clearly scoped jobs: garage or workshop rooftop arrays, RV/boat or portable camping setups, and modest backup systems. Plug‑and‑play or portable kits suit renters and occasional users. Larger home energy goals — whole‑house offsets, complicated roof layouts, or grid‑interconnected backup — usually benefit from professional design and installation.
Types of solar kits
- Plug‑and‑play / portable kits – Prewired panels and inverter(s) that connect to appliances or an extension cord; best for camping, sheds, or temporary use. Pros: easy setup. Cons: limited capacity and usually not code‑compliant for permanent grid interconnection.
- DIY rooftop solar kits – Panels, racking, inverter or microinverters, wiring, and hardware for a permanent roof mount. Pros: lower equipment cost. Cons: requires roofing, electrical, and permitting skills; may trigger local inspection and utility interconnection rules.
- Solar + battery kits – Packaged PV plus battery storage and a hybrid inverter for backup or time‑shifted use. Pros: outage resilience and self‑consumption. Cons: higher cost, battery sizing complexity.
- Hybrid solar + wind kits – Small wind turbine combined with PV for sites with good wind and solar resources. Pros: complementary generation. Cons: complex permitting, more moving parts.
- Pre‑packaged contractor kits – Vendor bundles used by installers; good middle ground if you want an owner‑supervised install with professional permitting and warranties.
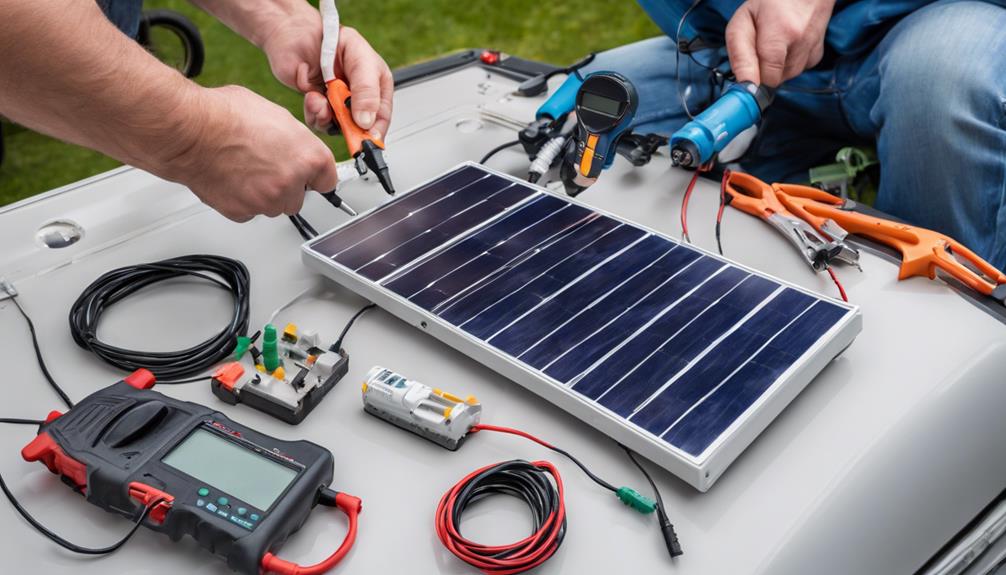
What’s in a kit? Plain‑English checklist
- PV modules (solar panels)
- Mounting hardware (roof rails, clamps, ballast or ground mounts)
- Inverter(s): string inverter, microinverters, or hybrid inverter (for battery systems)
- Charge controller (MPPT) for off‑grid or some battery setups
- Batteries and BMS (battery management system) if included
- Balance of system (BOS): wiring, conduit, breakers, DC/AC disconnects, grounding
- Safety devices and labeling to meet code (rapid shutdown components where required)
Note: A PV array plus BOS is a complete system — panels alone won’t power household circuits without an inverter and proper electrical integration (National Electrical Code requirements apply).
How to size a kit for your home (step‑by‑step)
- Read 12 months of electric bills to get annual kWh use (U.S. average ~10,700–11,000 kWh/year; EnergySage market averages are a useful benchmark).
- Estimate local production: typical U.S. locations produce roughly 1,000–1,600 kWh per kW of PV per year depending on sun exposure and tilt.
- Divide annual usage by local kWh/kW to get required AC kW. Example: 10,800 kWh ÷ 1,350 kWh/kW ≈ 8.0 kW required.
- Account for system losses (wiring, inverter, soiling) — add ~10–15%. In the example, target ≈ 9.0–9.5 kW pre‑loss installed capacity.
- If adding batteries, size storage by desired hours of backup or percent of daily load (e.g., a 10 kWh battery might cover essential loads for several hours).
These are simplified steps; site shading, roof orientation, and local utility rules change the outcome — use a shaded‑site assessment or pro design for full builds (EnergySage provides consumer sizing tools and market examples).
Costs & examples
Installer quotes are usually expressed as $/Wac. As an example only: a 7–9 kW home system at common mid‑market rates can cost tens of thousands of dollars before incentives; equipment‑only DIY kits will be cheaper but don’t include labor, permitting, or interconnection fees (see EnergySage for current market numbers and quotes).
Codes, permits, and safety
All permanent installs should comply with the National Electrical Code — see Article 690 (PV systems) and the 2023 NEC rapid‑shutdown and PV‑storage interface requirements. Local adoption and enforcement vary; always pull permits, use UL‑listed equipment, and schedule inspections. If you’re uncomfortable with roof penetrations, high voltages, or utility interconnection paperwork, hire a licensed electrician or NABCEP‑certified installer (NEC reference overview: surgepv).
Red flags for DIY
- Working on steep or fragile roofing without pro experience
- Systems above typical household voltages or large battery banks
- No plan for utility interconnection or anti‑islanding controls
- Equipment not UL‑listed or missing rapid shutdown devices
Batteries and energy management
Lithium‑ion chemistries dominate residential storage. Lithium iron phosphate (LFP) tends to offer longer cycle life and improved thermal stability versus many nickel‑rich formulations; chemistry affects warranty, usable capacity (depth‑of‑discharge), and BMS complexity (see NREL storage guidance). Batteries increase upfront cost but enable backup and higher self‑consumption.
DIY vs professional installation
When DIY is OK: small portable kits, ground‑mounted small arrays on low slopes, or experienced homeowners doing simple electrical work and handling permits. When to hire a pro: whole‑house systems, grid‑tied interconnection, battery backup with critical loads, complex roofs, or when you want integrated warranties and performance guarantees.
Maintenance & warranties
Panels: occasional cleaning and visual inspections; inverters: typical life 10–15 years; batteries: warranty periods vary (often 5–15 years depending on chemistry). Keep equipment manuals and record serial numbers for warranty claims.
Common myths to avoid
- A small off‑the‑shelf panel kit will not run a whole home without appropriately sized inverter and battery capacity.
- A standard grid‑tied PV system will usually shut down in a grid outage unless it includes approved battery backup or automatic transfer equipment.
- Federal incentives change over time — always verify current rules before budgeting.
Incentives, financing, and a dated note
As of June 26, 2026, the federal Residential Clean Energy Credit has applied at 30% for qualified residential installations through December 31, 2025; this and other program details are time‑sensitive — check the IRS for the latest rules and DSIRE for state/local incentives before you buy (IRS and DSIRE are authoritative sources).
Next steps
- Collect 12 months of bills and do the simple sizing math above.
- Use DSIRE to lookup state incentives and your utility’s interconnection rules.
- If you plan a permanent, grid‑interconnected system, get at least two installer quotes and compare equipment, warranties, and permitting services.
Disclaimer: This article is informational and not a substitute for professional design, local code requirements, or financial advice. Verify code, incentive, and safety details with local authorities, your utility, and the IRS before proceeding.
Selected authoritative resources: IRS Residential Clean Energy Credit, NREL storage reports, EnergySage consumer guides, NEC Article 690 (code guidance), and DSIRE state incentive lookup.


